Indoor jobs pick up during the colder months, especially when outdoor projects go on hold. But with that increase in interior work comes the challenge of keeping existing surfaces protected. Finished floors are often the first to take a hit from dust, tools, and heavy foot traffic.
That’s where using floor protection film can make a difference. It’s a quick way to keep floors shielded from scuffs, surface damage, or dust build-up, especially when crews are moving gear or coats of paint are going on nearby. Putting it down the right way from the start helps the job move along without surprises at the end. Here’s how we keep things efficient by applying protection film cleanly, safely, and without future residue.
Know When and Where to Use It
The first step is knowing when it makes sense to roll it out, and when to hold off. Floor protection film works best on dry, fully finished surfaces. That includes:
• Wood floors that have set and cured completely
• Sealed tile, vinyl, or laminate in good condition
• Projects with painting, sanding, or tool movement expected
What we avoid is applying it over freshly finished flooring. Timing matters. If a floor is still curing, it might take on marks or lift with the film when the job wraps up. Another factor to think about is heat and humidity in the building. Radiators, underfloor systems, or just tightly closed windows can make air feel warmer and heavier, conditions that may change how well the film holds.
Taking a few minutes to check the surface can set the stage for cleaner work later. If in doubt, we wait or test a small patch first. Even when you’re sure the floor is ready, the surrounding environment can throw a curveball. Be sure that the room has been ventilated and allowed to reach a comfortable, steady temperature. Avoid working in areas that have just recently experienced temperature swings from heating or rain coming inside, as moisture on the floor will change how the adhesive performs. Watching for subtleties like slightly damp corners or warm patches from radiators lets you avoid issues later.
Prep the Area First
A smooth surface makes everything easier. Laying protection film straight onto dirt or dust will affect how it sticks, and can lead to air pockets or small tears that only get worse with traffic. We always prep before applying.
• Sweep or vacuum up any grit, especially under radiators or along skirting
• Wipe down the surface with a dry cloth to clear up finer dust
• Check damp-prone spots like entryways or window areas and let them dry fully
Moving furniture or easing off edge trims gives more room to work and helps get the seal closer to the wall or baseboards. It may take a few extra minutes upfront, but it saves time tidying up lifted corners or scuffed areas later. If you take the time to inspect corners, behind doors, and around threshold strips, you’ll remove particles that could scratch the finish or damage the adhesive. Take care to also check beneath removable rugs or mats, as debris left here can migrate onto freshly exposed flooring once work starts.
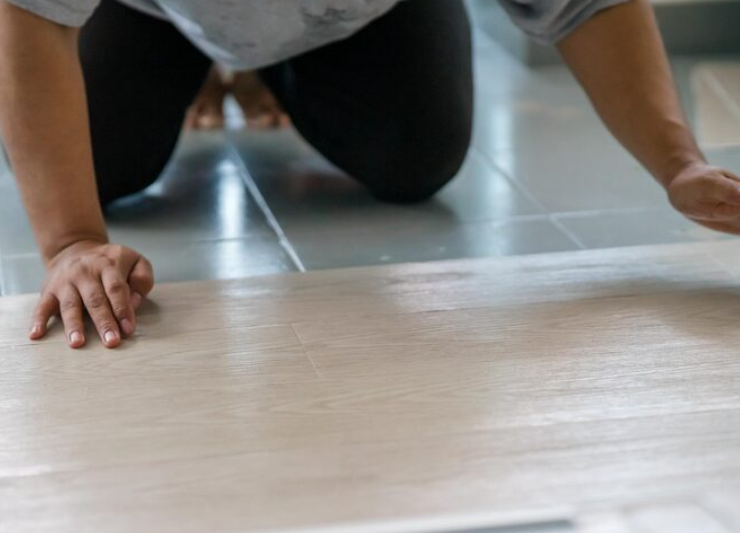
Apply Floor Protection Film the Right Way
Once the space is prepped, it’s time to apply. We usually start from one side of the room and work across, smoothing as we go. Going too fast or leaving bubbles means going back, which slows things down later.
• Roll out the film slowly in straight lines, keeping it close to the surface
• Use a roller, soft cloth, or flat tool to push out any air as soon as it appears
• Overlap each strip slightly for full coverage, then press firmly to finish the seal
We seal the edges wherever possible, especially in corners or high-traffic spots. That helps stop grit from getting underneath or the film lifting around the edges. The less movement underfoot, the longer it stays in place.
Our range of protection films at VDB Adhesives is chosen for both performance and ease of removal. These films are engineered to deliver safe adhesion for timber, laminate, and tile floors encountered in renovation and remodel projects, minimising residue and accidental lift during removal.
To ensure the best outcome, take time to press against the wall or skirting board, forming a consistent edge so the film won’t peel back from foot traffic. If the floor has deep grooves or beveled joints, carefully mold the film with your fingers to follow the surface. When joining strips, overlap just enough to avoid gaps but not so much that extra layers collect dirt or peel. Press out air as you go; large trapped bubbles weaken the adhesive and are often the source of future tears. Step back occasionally to check for any misaligned strips or wrinkled areas; a quick fix now is easier than after furniture moves in.
Keep It in Place and Remove It Properly
Once it’s set, it’s good, but it doesn’t mean we walk away without checking in. Rooms change as the day moves on. Doors open, ladders get dragged across, or moisture finds its way in through a boot tread.
• We look at corners and busy areas each day and press down lifted sections if needed
• Sharp tools or feet sliding heavy gear cause damage, so we avoid dragging anything across
• When the job’s done, we peel the film back slowly at a low angle so the adhesive lifts clean with the film
The goal is a smooth lift-off without leaving anything behind. If the floors were properly cured to start with, cleaned well, and the room stayed at steady temperature, the removal tends to go quickly without issues. It’s a good habit to keep the job site clear of excess clutter during the job, making it easier to spot corners that need to be resealed. In especially busy areas, extra floor checks may be necessary to keep the film in place and prevent debris from working underneath.
If at any point you spot torn edges or wrinkling, cut away the loose section and patch it with a new strip; don’t leave weakened film, as it lets in dirt and unravels faster under foot traffic. Always avoid waiting until after a spill or a wet day to remove the film; try to keep removal planned for a dry period and peel up in the original application direction. If a residue is left, a quick sweep with a soft brush or a lightly damp cloth (suitable for flooring type) can clear it up without effort.
A Clean Start and Finish for Every Job
Taking care to get it right from the beginning pays off at the end. With proper prep, careful application, and daily check-ins, floor protection film becomes one less thing to worry about. Scratches are kept off the floorboards, cleanup is faster, and clients get to see the finished space as it should look. Details like crisp film edges, no air pockets, and a regular inspection routine let workers and clients move confidently through the job site.
During cold spells, when the indoors becomes the focus, keeping those working areas clean and damage-free matters more. Whether it’s a small single-room job or a larger project, giving floors that extra layer of care helps everything move more smoothly right through to the last step. Not only does this save time on aftercare, but it also shows attention to detail that gets noticed in the finished project.
Protecting surfaces at the start of your winter indoor projects can help you avoid delays and unnecessary cleanup later. A properly applied layer of floor protection film keeps high-traffic areas in better condition and minimises the need for touch-ups. At VDB Adhesives, we focus on preparation, precise placement and the right conditions so the film adheres well and lifts away cleanly. Whatever surface you’re working with, laminate, tile or timber, we’ve got materials fit for the season. Get in touch today to discuss what your project needs.

